
REVIEW · WORKSHOPS
Vienna Photography Masterclass – Private Photography Lesson
Vienna at golden hour is already beautiful. This private masterclass turns that beauty into better photos with a photographer teaching you what to look for and how to set up your shots. I especially like the stop-by-stop guidance around the Hofburg and St. Stephen’s Cathedral area, plus the way the night option focuses on practical nighttime technique. One thing to keep in mind: the meeting point is a statue spot, and at night it can be a little tricky to locate quickly.
Here’s the core idea I like for you: you do not just walk past landmarks, you learn how to frame them. With a professional photographer guide working with you, the session is aimed at giving you camera settings and composition tips you can actually use right away. If you need a tripod, plan ahead because one is only available on request.
In This Review
- Key points to know before you go
- How this private photo lesson makes you see Vienna differently
- Day vs night in Vienna: what changes in your shooting mindset
- Hofburg and Heldenplatz: where your composition practice clicks
- Volkstheater, Parliament, and Rathaus: learning to photograph power buildings
- Graben and Kohlmarkt to St. Stephen’s Cathedral: classic Vienna, personal photos
- Albertina and Vienna State Opera: grand scale with a photo lesson finish
- Night photography guidance: how to get stable, sharp results after dark
- Price and value: why this 3-hour session is worth it if you engage
- What to bring and what to ask your photographer guide
- Should you book the Vienna Photography Masterclass?
- FAQ
- Where is the meeting point for this Vienna photography lesson?
- How long does the experience last?
- Is this a private tour or a shared group tour?
- What language is the tour offered in?
- Is a camera included?
- Can I get a tripod for the night shoot?
- What is included in the tour price?
- Do you offer both day and night photography options?
- Is there a mobile ticket?
- What is the cancellation window?
Key points to know before you go
- Private, personalized instruction with a local guide and a professional photographer guide during a 3-hour street walk
- Day and night options, so you can shoot Vienna in daylight grandeur or after-dark glow
- Imperial-city photo stops ranging from the Hofburg and Heldenplatz to Albertina and the Vienna State Opera
- Camera settings and composition tips are part of the teaching, including night photography guidance
- Tripod on request (camera not included), so low-light shooters should plan accordingly
- Meeting at Sigmund Freud Stele means arriving early and using your phone map can save stress
How this private photo lesson makes you see Vienna differently
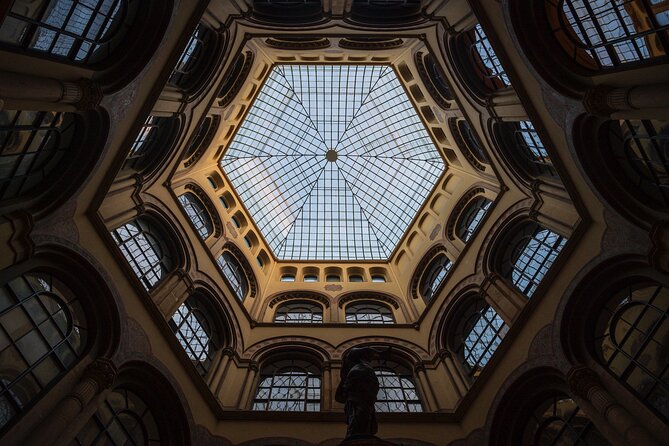
A good photography tour does two jobs at once: it gets you to strong locations and it teaches you how to make choices at the moment you’re standing there. That’s what I like about this one. You spend your time in Vienna’s most photogenic stretches, but the lesson stays focused on turning what you see into a plan for the camera in front of you.
You’ll get guidance from both a local guide and a professional photographer guide. The local guide helps you connect what you’re seeing with the right viewpoints and photo priorities. The photographer guide then pushes the technical side, like how to approach composition and how to use camera settings in a way that matches the scene.
For value, the big plus is that this is private to your group. In other words, you’re not just being herded along while everyone waits for the slowest pace. You can ask questions, try an idea, and get corrections as you go. That is what makes a 3-hour session feel like more than a sightseeing walk.
The main consideration is simple. If you show up without a clear goal, you might leave with pretty pictures but not much skill transfer. If you want this to be a true lesson, come ready to shoot, ask, and tell your guide what kind of photos you want (architecture close-ups, wide shots, or nighttime city glow).
More golden light caught between acts:
- Vienna: Christmas Photoshoot with a Pro Photographer
★ 4.3 · 241 reviews - Salzburg: Photography Tour with a Professional Photographer
★ 4.6 · 102 reviews - Vienna at night! Private photo tour of Vienna’s most beautiful buildings
★ 5.0 · 63 reviews - Hallstatt: Photoshoot with a Professional Photographer
★ 4.5 · 58 reviews
Day vs night in Vienna: what changes in your shooting mindset
This experience comes in two modes, and you’ll feel the difference in what you’re trying to capture.
On the day tour, the goal is clarity. You’re working with strong architectural lines, detailed facades, and wide squares where you can practice framing. Daylight is forgiving, so it’s a great time to work on composition choices like symmetry, perspective, and how to use foreground details to add depth.
On the night tour, the goal shifts. You’re capturing illuminated landmarks and street ambience, and the teaching turns to nighttime technique. Night photography usually means slower shutter speeds, careful exposure decisions, and steadier handling. That’s why the tripod option matters, and why you’ll want to slow down your pace and concentrate on stable shots.
Night also changes your practical planning. You might be working with darker streets, busier lighting, and crowds moving unpredictably through the frame. The upside is that Vienna’s landmarks look extra cinematic after dark. The downside is that low light punishes shaky hands, and it can be tough to locate your meeting point if you arrive late.
If you’re choosing between the two, think about what you want to improve most. Want composition and architectural framing? Pick day. Want nighttime settings and street glow? Pick night.
Hofburg and Heldenplatz: where your composition practice clicks
Your route starts in the imperial core, and the first stops are perfect for learning how to handle big subjects without letting your photos look flat.
The Hofburg area gives you a mix of grand building massing and classic Vienna streetscape views. This is where you can practice stepping back for wide context, then moving in for detail. You can also test how different angles change the feeling of scale, especially with architecture that feels designed for strong symmetry.
Next is Heldenplatz. It’s an open civic space, which is handy for learning spacing and line-of-sight framing. Open plazas let you create leading lines and balance foreground and background. They also make it easier to choose the kind of photo you want, wide and postcard-like or tighter and more graphic.
What you gain early in the tour is momentum. Once you’ve learned how your guide wants you to frame at Hofburg and Heldenplatz, the rest of the walk becomes easier. You start spotting shapes faster, and you stop shooting on autopilot.
A practical note: since this is a walking photo session, your feet and your camera settings both matter. When you’re moving, keep your settings and exposure approach consistent for the next few shots instead of constantly changing everything.
Volkstheater, Parliament, and Rathaus: learning to photograph power buildings
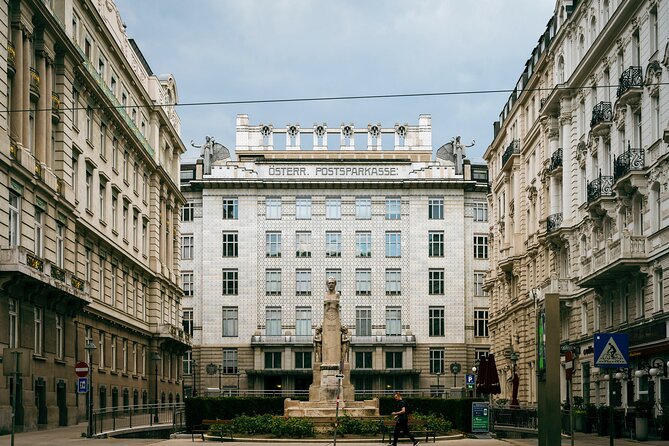
As you move through Vienna’s Ringstraße corridor, you get a nice variety of architectural styles and building textures. This part of the experience is especially good if you like architecture and want your photos to look intentional rather than accidental.
Volkstheater is a great transition stop because theaters tend to have strong facades and lighting options. Even if you’re shooting daytime, you can learn how to avoid the common mistake of cutting off important elements or centering everything without thought. A good composition here often comes from choosing one standout feature, then using surrounding structure to frame it.
The Österreichisches Parlament stop brings you into the world of formal government architecture. That means more rigid lines, stronger geometry, and a higher need for perspective control. This is where the lesson helps you think about camera position and how to keep verticals from looking like they’re leaning. You’ll also get practice deciding between a symmetrical shot or one that uses angle to add drama.
Then comes Rathaus, the City Hall. Rathaus is where you can experiment with how much of the building to include, how to handle reflections or street context if they appear, and how to balance detail and scale. It’s a good place to try multiple approaches because there’s plenty to shoot in a small area.
This stretch is a reminder that architecture photography is not only about the building. It’s about your stance, your angle, and your willingness to take a few repeats until one feels right.
More crafts learned first-hand:


Graben and Kohlmarkt to St. Stephen’s Cathedral: classic Vienna, personal photos
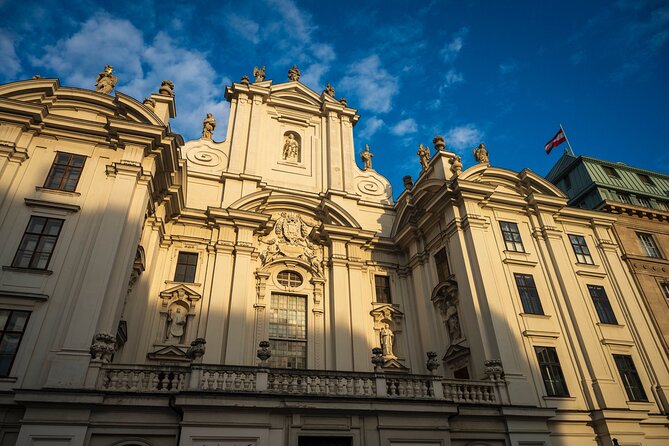
After the bigger institutional buildings, you’ll move into the shopping streets around Graben and Kohlmarkt. This is a smart change of pace for your photo brain. Streets with storefronts and pedestrian flow teach you how to photograph “in between moments,” not just landmark monuments.
The advantage here is variety. You can shoot clean street geometry, watch for window reflections, and look for photo frames created by street corners. If you like street photography but want it in a safe, historic setting, this section delivers.
Then you arrive at St. Stephen’s Cathedral. This is one of Vienna’s most iconic photo subjects, and it’s also where beginners often get stuck. The lesson helps you avoid the typical souvenir approach. Instead of only shooting a straight-on view, you can experiment with angles, include nearby street elements, and practice capturing the cathedral as part of the surrounding scene.
Daytime at the cathedral often favors crisp detail. Nighttime can turn it into a light-and-shadow playground, with illuminated surfaces and dramatic contrast. Either way, it’s a strong stop for learning how to handle a “too famous” subject without making your photo feel like every other photo.
If you’re doing the night option, this is also where your steadiness and exposure habits matter most. Don’t rush. Take a few test shots early, get your look, then build your sequence.
Albertina and Vienna State Opera: grand scale with a photo lesson finish
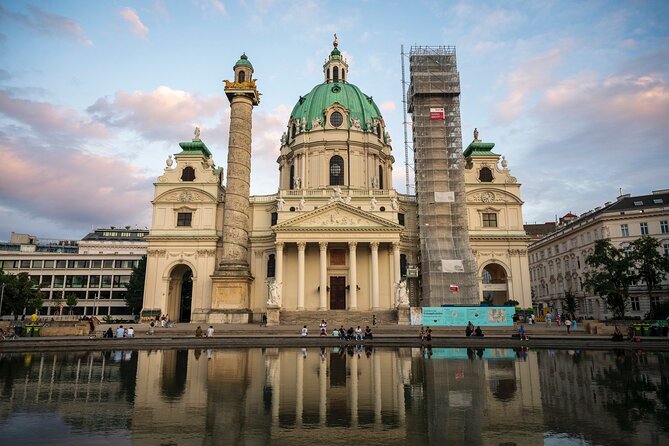
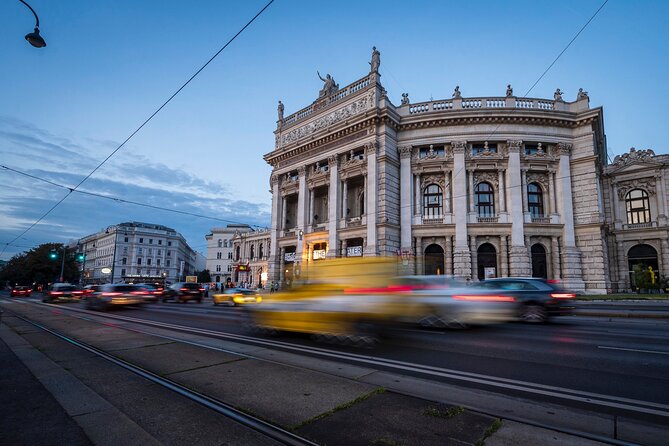
Late in the route, you hit two heavy hitters for photography: Albertina and Wiener Staatsoper (Vienna State Opera). These stops are perfect for learning how to transition from architecture details into larger, more cinematic frames.
Albertina is a useful stop for photographers who enjoy controlled composition. Museum exteriors and surrounding urban context tend to support “frame within a frame” ideas, like using architectural edges to guide the viewer’s eye toward the main subject. It’s also a good spot to practice tightening or widening your shots so your photo has a clear focus.
Then it’s the Vienna State Opera. Opera houses are designed to impress, so you can learn how to capture both the building’s symmetry and its atmosphere. Depending on the time of day, the same facade can tell very different stories. Day can emphasize structure and clean lines. Night can emphasize mood, lighting, and the glow around entrances and signage.
This part of the tour is also a great time to ask for a final refinement. If you’ve been working on composition all along, tell your photographer guide what feels hardest. For example, you might struggle with choosing between wide context and tighter framing. Asking that question here is efficient because you’ll have a strong subject in front of you to test the answer.
By the time you reach the end of the walk, you should feel more confident about what to do when you stop at a landmark and ask yourself, What is the point of my photo?
Night photography guidance: how to get stable, sharp results after dark
If you book the night tour, the teaching focuses on mastering nighttime photography techniques. That usually means you’ll spend time thinking about how your camera settings affect exposure and sharpness, not just how beautiful the scene looks.
Night in Vienna brings a lot of light sources. That can be tricky, because bright areas can overpower the rest of the frame, and street lighting can create mixed color casts. The lesson helps you adjust for these realities, so your photos look intentional instead of washed out or oddly tinted.
You’ll also want to lean on steadiness. The tour notes that a tripod is available upon request, so if you plan to shoot at night, consider asking for it ahead of time during your planning. A tripod does two things for you right away: it helps your shutter speed choices, and it reduces the temptation to use shaky handheld compromises.
Even with a tripod, you’ll benefit from a calm routine. Treat your first minutes at each major stop as setup time. Take a test shot, confirm your framing, and then commit to a short sequence. That approach keeps your night photos consistent.
One more practical tip from the real world: if you’re shooting a late session, arriving on time is key. The meeting point is a statue, and at night it can be harder to spot quickly. Give yourself a little buffer so you start the lesson relaxed, not searching in the dark.
Price and value: why this 3-hour session is worth it if you engage
At $177.44 per person for about 3 hours, this masterclass lands in the category where value depends on how you use it. The good news is that you’re not just paying for a guide. You’re paying for focused instruction with a professional photographer and a planned route through major photo stops.
Here’s why that matters. In a short session, the biggest risk is wasting time. Time gets wasted when you walk without guidance, ask nothing, or only take photos without learning what to adjust next time. With this tour format, the lesson is built to reduce that risk. You get direction, you get camera-setting coaching, and you get multiple strong photo chances.
Also, it’s private to your group. That tends to make the per-person value feel more fair when you compare it to larger group tours where instruction is diluted. If you can bring a friend or two, ask about group discounts, since the tour mentions them as a feature.
What’s not included is also part of the value picture. Your camera is not provided, and a tripod is only available on request. If you show up without planning for low-light needs on the night tour, you might feel limited.
My practical bottom line: this is a smart buy if you want to level up your photography while seeing Vienna’s most photogenic corners. If you only want generic sightseeing photos with no intention of learning, you can probably get similar pictures by wandering on your own.
What to bring and what to ask your photographer guide
You’ll get the best results if you show up ready to shoot and ask direct questions. This tour already covers camera settings and composition guidance, so your job is to make your questions specific.
Bring:
- Your camera and the lenses you actually plan to use
- Your charger or spare battery
- If you have one, a way to stabilize (and if not, request the tripod since it’s available on request)
- Your phone map handy for the meeting point
Useful questions to ask early:
- What camera settings should I start with for bright daytime scenes versus nighttime lights?
- How do you want me to approach composition at major landmarks like St. Stephen’s Cathedral?
- If my photos feel too wide or too tight, can you suggest one change I can test right away?
You’ll also do well if you tell your guide your style goal. Are you after architectural symmetry? Street atmosphere? Dramatic night lights? When the photographer knows your preference, the stops and teaching land better.
One last logistics note. The meeting point is at Sigmund Freud Stele on Universitätsstraße, postal code 1090 Wien. The statue can be hard to find quickly, especially if you’re unfamiliar with the area. Arrive early, use your phone for orientation, and you’ll keep the first minutes from turning into a scavenger hunt.
Should you book the Vienna Photography Masterclass?
Book it if you want real instruction in a short time and you like Vienna’s landmarks enough to photograph them more thoughtfully. This tour works especially well for people who already own a camera but want help getting more consistent results, and it’s a great pick if you’re curious about night photography and want structured guidance.
Skip it only if you’re mainly looking for casual sightseeing with minimal effort. At its best, this experience is hands-on. If you participate actively, take the guidance seriously, and ask questions, you should leave with both stronger photos and a clearer sense of what to change next time.
FAQ
Where is the meeting point for this Vienna photography lesson?
The tour starts at Sigmund Freud Stele, Universitätsstraße 1536/8, 1090 Wien, Austria.
How long does the experience last?
It lasts about 3 hours.
Is this a private tour or a shared group tour?
It is private. Only your group participates.
What language is the tour offered in?
The experience is offered in English.
Is a camera included?
No, the camera is not included.
Can I get a tripod for the night shoot?
A tripod is available upon request.
What is included in the tour price?
Included items are a local guide, a private tour, and a professional photographer guide.
Do you offer both day and night photography options?
Yes. The experience includes a day street photo tour and a separate night photo tour.
Is there a mobile ticket?
Yes, it includes a mobile ticket.
What is the cancellation window?
You can cancel for a full refund up to 24 hours in advance of the experience’s start time. Free cancellation is offered.
Just added to the bill for Vienna
Workshops, compared.
Chocolate Workshop in Chocolate Museum w/ Tasting
Read our review →
Austrian Apple Strudel Cooking Class including Lunch in Salzburg
Read our review →

Chocolate workshop in Chocolate Museum Vienna “BO-YO”
Read our review →
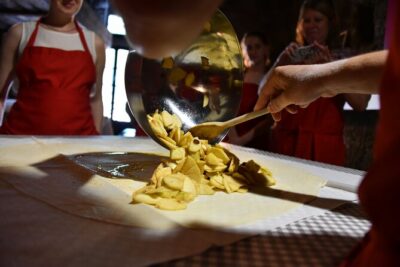
Salzburg Christmas Cookies and Apple Strudel Cooking Lesson
Read our review →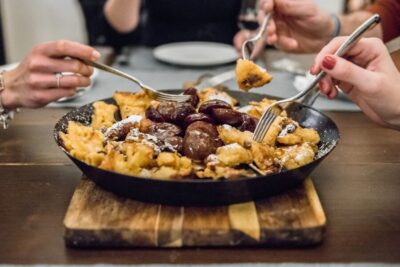
Traditional Kaiserschmarrn Cooking Class & Tasting
Read our review →
Cookies and Apple Strudel Cooking Class Including Lunch
Read our review →Browse the lists this tour appears in